Azure Kubernetes Services: Application deployment, update & rollback

Hi there! 👋 I'm Ritik Gupta, a passionate tech enthusiast and lifelong learner dedicated to exploring the vast world of technology. From untangling complex data structures and designing robust system architectures to navigating the dynamic landscape of DevOps, I aim to make challenging concepts easy to understand. With hands-on experience in building scalable solutions and optimizing workflows, I share insights from my journey through coding, problem-solving, and system design. Whether you're here for interview tips, tutorials, or my take on real-world tech challenges, you're in the right place! When I’m not blogging or coding, you can find me contributing to open-source projects, exploring new tools, or sipping on a good cup of coffee ☕. Let’s learn, grow, and innovate together!
In this blog, we will see how to create an AKS cluster and how to deploy applications using the AKS.
What is Kubernetes & how its Use Cases
What is AKS?
Azure Kubernetes Service (AKS) is a managed Kubernetes service provided by Microsoft Azure. It allows users to scale, manage, and deploy containerized applications. As AKS manages the underlying infrastructure and offers extra features like automatic scaling, monitoring, and integration with other Azure services, it makes it simpler to deploy and manage containerized applications in Azure.
There are many ways to create a K8s cluster.
The Web interface
Command line Interface
Terraform(IaaS)
We'll launch the cluster and deploy our application using the Web interface and the imperative method.
Getting Started with AKS
Creating the K8s Cluster
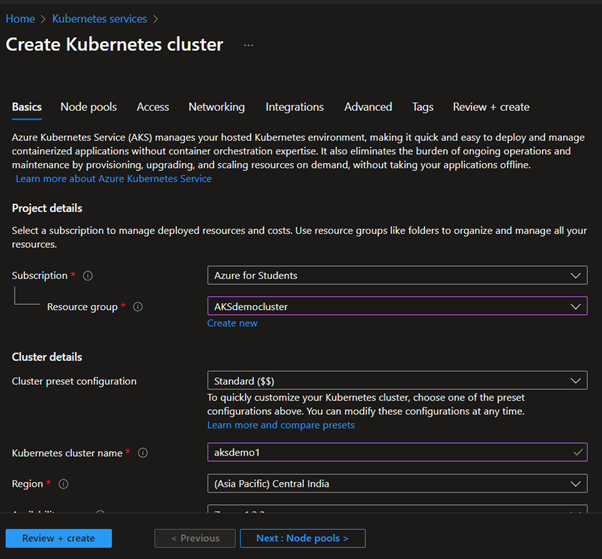
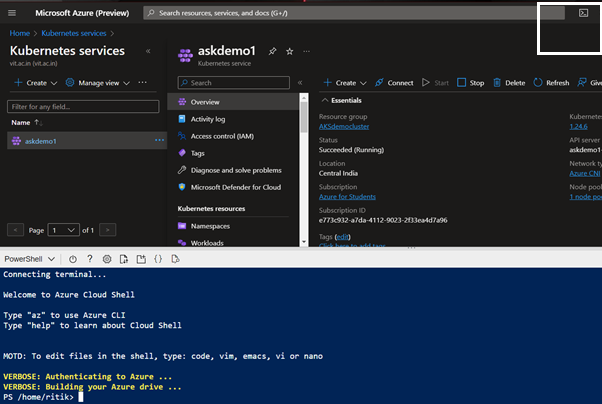
first log in to the Azure portal and search for Kubernetes.

Creating a new resource group for this cluster
And giving the name of the k8s cluster & selecting the region.
Moving to the node pool blade
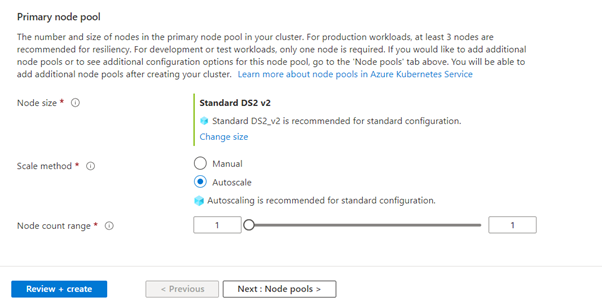
We are using the DS2 v2 as the VM size for the Node. This is a great choice if you need to take the advantage of enhanced networking services that it offers,
Especially when you want your k8s deployments to talk to azure services like Azure MySQL
We’ll set the node count to one later we’ll scale the cluster to 2 using the Azure CLI.
Moving to the Networking blade
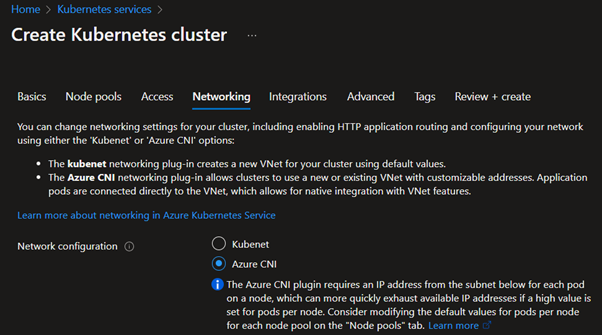
In the networking blade, we will choose the CNI – container networking interface
With Azure CNI- every Pod will get the Ip address from the subnet, which gives the pod full virtual network connectivity.
Review + create
Once the final validation has been verified as successful, click the "Create" button to begin the cluster deployment. Once finished, we'll be able to deploy our application in the Azure K8s single-node cluster.
Connecting the cluster
We’ll use the Azure CLI by clicking the Top right on the page
Now our cluster is ready to deploy the application. There are many ways to deploy applications to the K8s.
Imperative
Declarative – YAML or JSON
Let's run our first application
We'll use the .NET application Provided by Manoj Nair. The code repository is on GitHub and the Docker image is on DockerHub. You are free to use your own Custom image for deployments.
Create Deployment
kubectl create deployment myapp --image=manojnair/myapp:v1 --replicas=1

To check the current deployments
kubectl get deploymentsIt shows the currently running Deployments.

To check the pods Running
kubectl get podsList down all the current running pods

Note: Now that our app has been deployed, we must connect to it from outside the k8s cluster. To do this, we will use k8s services. A load balancer in Azure is created when we create a service of that type, and it receives the public IP. Additionally, we can connect to our application using the load balancer.
The
kubectl exposecommand will be used which Takes a replication controller, service, replica set, or pod and expose it as a new Kubernetes service.kubectl expose deployment myapp --type=LoadBalancer --port=80 --target-port=80
kubectl get svcto get the running services
we'll use the External Ip to connect the application using the browser.

Now we are running 1 replica of our application to scale our deployment
kubectl scale deployment myapp --replicas=3

After scale, there will be 3 pods running

Updating the Application
We'll now update the app from version 1 to version 2, and then from version 2 to version 3.
Type 1: changing the image type
kubectl set image deployment/myapp myapp=manojnair/myapp:v2 --record=truethis command will change the image version from v1 to v2.
we can use this command to change the image.

Type 2: Using the edit command by editing the deployment API resource using the editing tool. By changing the version of the image in the file.
kubectl edit deployment myapp --record=truethen find the replica and then change the no. of replicas to the updated replica.

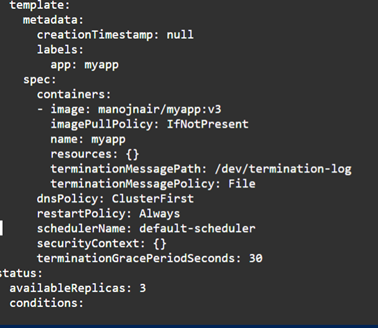
then save the file it will automatically update the application and re-run the pods.
Roll-Back the application
To revert to the previous change
kubectl rollout undo deployment/myapp
Thanks for reading! I hope you understood these concepts and learned something.
If you have any queries, feel free to reach out to me on LinkedIn.